Table Of Content
When you are drawing, it might also assist you in avoiding making mistakes. Be sure to start drawing with very light lines as you will need to erase parts of it in some of the steps. Light lines will also make it much easier to correct mistakes. The lines in the examples have been made slightly darker just so that they are easier to see. Utilize blending stumps or tortillons to gently blend and smudge the graphite, creating seamless transitions between the curls and softening any harsh lines. This technique adds a sense of realism and softness to the overall appearance of the curly hair.
How to Draw Straight Hair
Fragonard's "Twins": Coincidence or Artistic Exchange? - The Metropolitan Museum of Art
Fragonard's "Twins": Coincidence or Artistic Exchange?.
Posted: Wed, 21 Dec 2016 08:00:00 GMT [source]
Draw a line from the hairline to the back of the head to create the hair part (this can be center or to the side somewhere). Next, sketch several thick, long locks of hair extending from the top of the head to the shoulders (or wherever you prefer). People are some of the most fascinating and difficult subjects to draw.
STEP NO.03: CREATE VOLUME IN CURL :
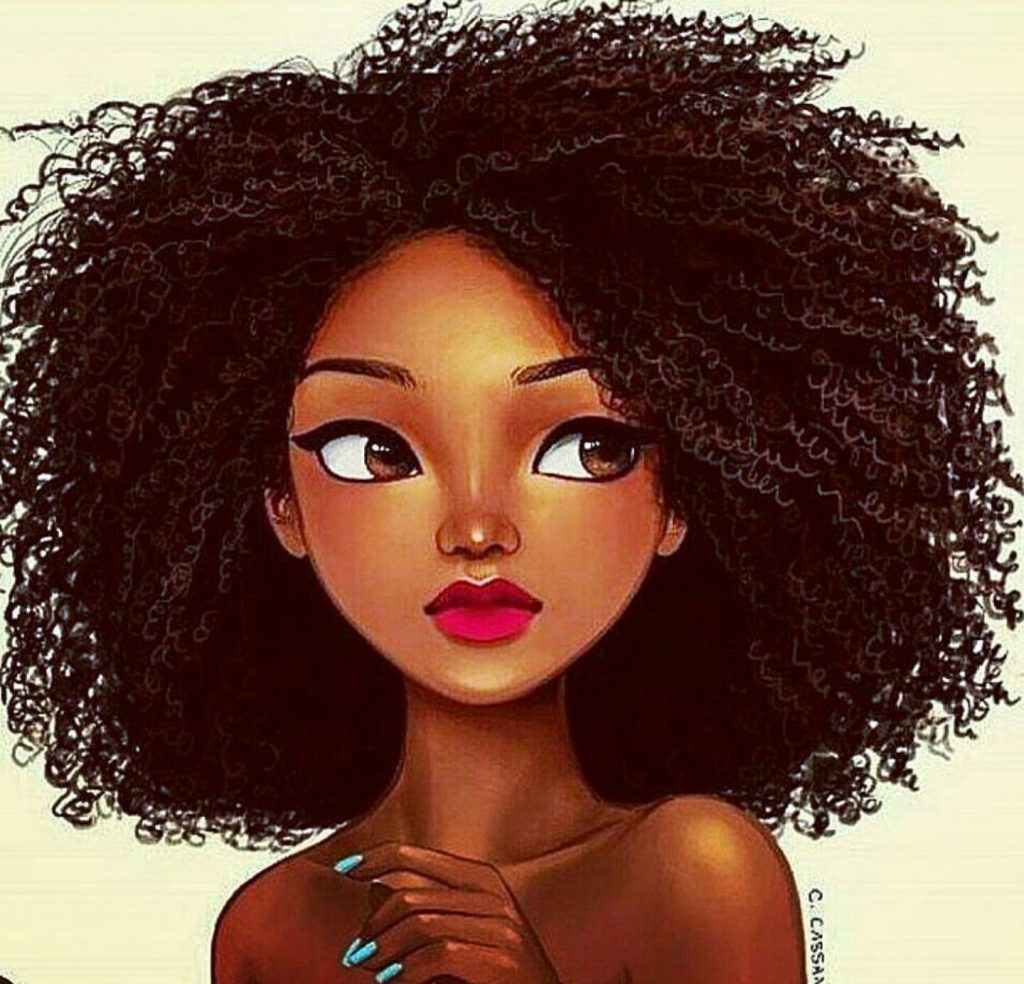
The most important step is mastering the technique to produce the curls, which you will then repeat until you have covered the entire head by drawing curly hair realistic with pencil. Since this is a short hairstyle, keep them closer to the shape of the head, adding just slightly more volume to the outline of the skull. To preserve your finished curly hair drawings and prevent smudging, consider using a quality fixative spray. This protective coating helps set the graphite in place, ensuring the longevity and integrity of your artwork.
Step 5: Add shading
'Happy Little Trees' Painter Bob Ross Didn't Have Curly Hair and Your Whole Life Is a Lie - Esquire
'Happy Little Trees' Painter Bob Ross Didn't Have Curly Hair and Your Whole Life Is a Lie.
Posted: Tue, 30 Aug 2016 07:00:00 GMT [source]
Decide where you want the light to fall and then outline those areas using the shadow lining technique. If you often find yourself getting lost in the details, this step will help you keep track of the overall lighting so you can be more confident when drawing the individual hairs. It helps to make loose outlines of the skull before you start drawing hair. If you draw hair without the 3 dimensional shape of the human head in mind, it will lack volume and you risk chopping off a part of the skull. For most people with long hair, you can expect at least 2 centimeters of “hair height” on top of their actual height and at least 2 centimeters on the sides as well.
The intricate patterns and textures of curls offer a unique opportunity to experiment with shapes, lines, and shading. Whether you're a seasoned artist or just starting out, mastering the art of drawing curly hair can elevate your artistic repertoire and bring a new dimension to your creations. So, grab your pencils, prepare your sketchbook, and let's embark on an artistic adventure into the captivating world of drawing curly hair. By incorporating these tips and tricks into your artistic practice, you can infuse your curly hair drawings with a heightened sense of realism and artistry.
Movement and Flow
Curly hair comes in a diverse range of patterns, from loose, flowing waves to tightly coiled spirals. Each curl type possesses its own distinct characteristics, such as the width of the curls, the degree of springiness, and the overall volume of the hair. By familiarizing yourself with the various curl patterns, you can develop a nuanced approach to capturing the diversity of curly hair in your artwork. Work on one part of the hair at a time, while following the general direction in which the strands flow.
Popular Tutorials
Make a few circles that get progressively smaller from the largest to the smallest. Make the hair chunks thicker at the roots and then thinner at the ends. Individual hairs form together to create sections or hair strands.
How to Draw Hair Step by Step Tutorial
The step-by-step guide to drawing curly hair offers a systematic approach that captures the intricate patterns and textures with precision and artistry. Moreover, the tips and tricks for adding realism provide valuable insights into achieving a heightened sense of authenticity in curly hair drawings. By studying real-life references, focusing on light and shadow, and emphasizing individuality, artists can elevate their artwork to new heights of visual impact. When embarking on the artistic endeavor of drawing curly hair, having the right tools and materials at your disposal is essential for bringing your creative vision to life. From sketching the initial outlines to adding intricate details, the following tools and materials will equip you to capture the unique beauty of curly hair with precision and artistry.
Looking for others who love drawing? Join our Art, Design, Photography, and Drawing Club on Facebook!
After you have completed the head, continue by sketching a guideline for the hairline, as demonstrated in the preceding example. If you’ve drawn hair before, you may complete this stage mentally without drawing it down, but I always make an effort to at least draw some faint lines. Gradually build up the depth and volume of the curls by layering darker shades of graphite. Use a range of pencils, from 2B to 6B, to create contrast and dimension within the curls. Pay attention to the areas where shadows fall and the areas that catch highlights, enhancing the three-dimensional quality of the hair.

When creating your first layer of pencil strokes, mix it up with a variety of different line weights. I use a mixture of dull and sharpened pencils as well as mechanical pencils. As you are creating each stroke, remember to press and then lift as you approach the area you want to highlight. Work your strokes inwards so they fade in the middle of the lock. Drawing hair can be an intimidating task for those who are just learning how to draw.
After reading this you are sure to know how to draw curly hair and the different types of curly hair. Whether you want to know how to draw curly hair that has loose curls or curly hair that has lots of coils to them, it’s quite easy. The below image includes hairstyles consisting of irregular layers and overlapping locks. If we only had the silhouette, we wouldn’t notice all these details, thus I need to contrast the different sections in order to highlight these shapes. You don’t need to give too much thought to where you’re going to put them since the lines will go wherever your pencil is pulled to.
For easy hair drawing, many artists choose to simplify the hair using basic shapes, or anything else that helps them define the volume, the angles, and to easily approach values. Once you draw the basic head shape, it’s time to go further and draw the definite shape of hair just by looking at the reference photo of curly hair drawing. As you continue to draw individual strands of hair, the voluminous form you first sketched to indicate the hair will start to take on a more comprehensive look. At this stage, you should try to avoid drawing lines that overlap or otherwise duplicate those you’ve already drawn. For a more realistic appearance, while sketching hair, I advise incorporating variances in the curves of the hair. As the hair gets thinner, I like to keep the curves bigger at the top (nearer the roots).
Embracing the individuality of curly hair allows artists to celebrate its diversity and express the beauty of natural variation in their drawings. By observing and appreciating the distinct qualities of each person's curls, artists can imbue their artwork with authenticity and a profound appreciation for the rich tapestry of curly hair. By honing their skills and embracing the nuances of curly hair, artists can create captivating and evocative representations that resonate with authenticity and visual allure. So, let the curls inspire your creativity, and may your artistic journey be filled with the joy of capturing the mesmerizing essence of curly hair on paper. Achieving a sense of realism in your curly hair drawings requires attention to detail and a keen understanding of light, texture, and form. By implementing the following tips and tricks, you can elevate your artwork to new heights of authenticity and visual impact.
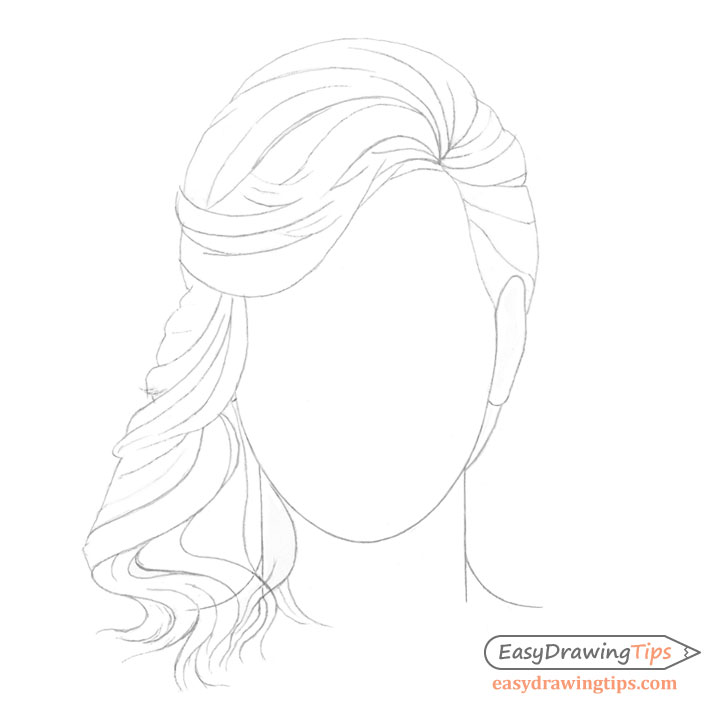
• On the back of the head (2) there are several layers of hair, but since it’s straight hair, the edges are almost unaffected, which allows a very subtle falling around the neck. Let’s keep in mind that there is always space between strands and over layers of hair, which builds up to create volume. Hair locks must somehow wrap the head following the curves of its surface. Both circles have a layer around them, but A looks more like a flat shape, whereas B looks to be more spherical. For this, you need to decide on a direction from which the light should reach the hair.
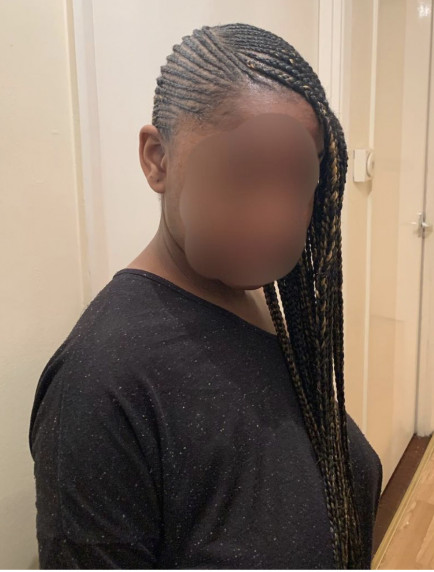
Drawing curly hair is really fun and absolutely great for building confidence when it comes to adding texture. • My first step was to draw the outline of the main lock (the one which will be the base of our drawing), following the direction in a S shape. These days, more people are embracing their natural hair texture in all its wavy, curly, coily, or kinky glory. While it's important to keep your strands healthy in order for them to look their best, the right haircut is also helpful in that pursuit. Add a few additional lines towards the top and all around the parting using little curved arches to fill them in. These aren’t entire curls since they’re supposed to depict the part of the hair that rests underneath the major curls that you’ve drawn thus far.
This tutorial shows how to draw female hair with three different hairstyle variations including natural looking, straight and curly hair. Each style includes step by step drawing examples and explanations. Curly hair possesses a natural sense of movement and flow, influenced by factors such as gravity, wind, and the individual's gestures. Capturing the dynamic nature of curly hair involves skillfully rendering the directional movement of the curls, as well as conveying the way they interact with the surrounding space.


No comments:
Post a Comment